Author Archives: Alf

Tweaking and extending Episerver Forms

I’m really glad that Episerver is replacitng their Forms creation tool “XForms” and started to like Episerver Forms. Especially when it comes to a few highlights:

  • Forms and the form fields are Content Types. You can create custom markup for your fields by simply adding separate Views.
  • You can also extend and create your custom form fields by simply adding more content types. See Māris Krivtežs’ blog post about this.

However there are some areas I’m not that happy about.

Working with Forms in Edit mode

What I really like is how the Edit mode is extended so that the Editor doesn’t really need to work with the form as the Blocks it actually is. Edit mode has some new panes and thingies to easily work with the form.

edit mode - forms

But Episerver is using the normal Block preview template. But since everything is based on blocks this can easily be solved using a specific preview Controller and View for the Forms Container Block. In my example I have also added support for Element Blocks, even if they are only visible for a short moment when editing them.

Submitting Forms

One thing that annoys me a bit more is that Episerver Forms makes an AJAX request to submit the form. The reasons I don’t feel this is a good idea is because it’s not only making the site dependant on JQuery, if you’re already using JQuery the user will now download the JQuery library twice. Episerver Forms is using an old version of JQuery (1.7.2) from March 2012, I hope there won’t be any conflicts between your version and this one.

I’m trying to figure out what I can do to make Episerver Forms use a normal HTTP Request with POST to submit the forms instead but first I need to understand what the current controller “FormSubmitController” does.

I’ll dig deeper into this and get back to you.

My GitHub Repository for playing with Episerver Forms might be updated while waiting for the blog post.

Creating a Content Folder that only allows specific Content Types

If you need to organize the content among Assets, such as blocks and media, you can do this by creating your own Content Types that inherits from ContentFolder.

Unfortunately the Episerver UI only supports creating Content Folders in the folder section of the Asset pane, so you’ll need to find a way to create these new folders. If it’s a strict structure it’s very easy using the ContentRepository in Episerver. But if the editor should create them you’ll probably need to create a separate view for this or do some Dojo tweaks.

I might look more into the first option using some inspiration from Fredrik Vig‘s “Instant Templates“.

But for now, let’s focus on creating folders that only allows specific types.

Cut to the code

First of all, I need some Content Types that represents my folders – one that only allows Teaser Blocks and one that only allows Image Files, see Alloy Templates to look further into these two Content Types.

[ContentType(GUID = "964063f0-613b-4ce5-85a0-2d11fee0b905")]
[AvailableContentTypes(Availability.Specific, Include = new[] { typeof(TeaserBlock) })]
public class TeaserContentFolder : ContentFolder
{
}

[ContentType(GUID = "e730c883-f9b7-4d5e-b309-a00070159771")]
[AvailableContentTypes(Availability.Specific, Include = new[] { typeof(ImageFile) })]
public class ImageContentFolder : ContentFolder
{
}

At startup I will make sure that these two folders are created using an Initialization Module:

[InitializableModule]
[ModuleDependency(typeof(Web.InitializationModule))]
public class RestrictedContentFolderInitializationModule : IInitializableModule
{
    public void Initialize(InitializationEngine context)
    {
        IContentRepository contentRepository = ServiceLocator.Current.GetInstance<IContentRepository>();

    ContentReference siteAssetFolder = ContentReference.SiteBlockFolder;
        IEnumerable<ContentFolder> children = contentRepository.GetChildren<ContentFolder>(siteAssetFolder).ToList();

        CreateSpecificFolder<TeaserContentFolder>(children, "Teaser folder", siteAssetFolder, contentRepository);
        CreateSpecificFolder<ImageContentFolder>(children, "Image folder", siteAssetFolder, contentRepository);
    }

    public void Uninitialize(InitializationEngine context)
    {
    }

    private void CreateSpecificFolder<T>(IEnumerable children, string teaserFolderName, ContentReference siteAssetFolder, IContentRepository contentRepository) where T : IContent
    {
        if (children.Any(child => child.Name == teaserFolderName))
        {
            return;
        }

        var teaserFolder = contentRepository.GetDefault<T>(siteAssetFolder);
        teaserFolder.Name = teaserFolderName;
        contentRepository.Save(teaserFolder, SaveAction.Publish, AccessLevel.NoAccess);
    }
}

This will make sure that you’ll have two folders in the Assets Pane.

asset folders

So when I try to create any Blocks in the Teaser folder, I’ll only be able to create a Teaser block, and as usual when I’m only able to select one Content Type, it will automatically select it without giving me a list of available Content Types.

create teaser block

And when I try to upload files to the Image folder, I will only be able to upload files of that specific Media Type. Which in this example means, only images and not text files.

upload files

And when I try to create a Block in the Image folder, I will not be able to select any Block Types since none are available.

The code is also available on the GitHub Repository https://github.com/alfnilsson/RestrictedContentFolders

If you’re a Dojo Guru and have a way to tweak Episerver UI to allow the editor select which type of folder to create, please hit me up!

Code best practices and performance optimization – the summary

This is a summary of my session “Code best practices and performance optimization” that I held during Episerver (still trying to learn the new casing format) Ascend 2015 in Las Vegas and the Episerver Tech forum in Stockholm.

The session mentions in three areas some fundamental tips and tools on profiling your solution and how you can work with the Episerver CMS API.

  • Tools
  • Distractions
  • Scenarios
    • SessionState
    • Loading Content & Episerver API
    • Cache
    • Race Condition Locks

So let’s begin!

Tools

Here are some of the tools I used in my session to see what ails my application.
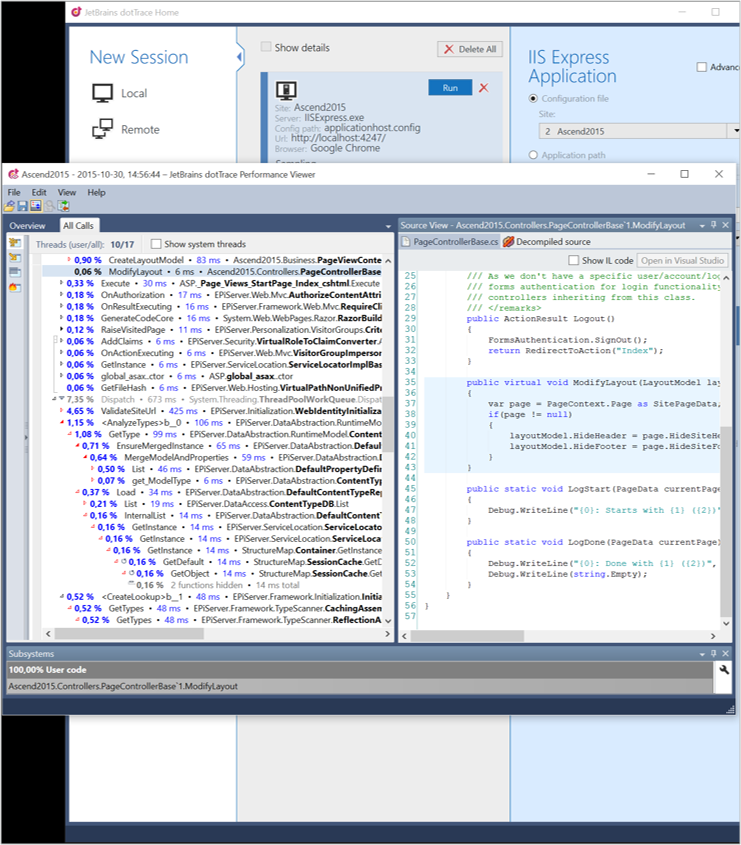
DotTrace

DotTrace from JetBrains is a cool tool that we use alot at NetRelations to monitor CPU and memory usage as well as keeping track on method calls and time in your application.

It has a quite high cost so you can find some other options such as the built in profiling tool in Visual Studio which is getting better through each version or ANTS Performande Profiler from Redgate.

However JetBrains are continously improving their tool continously and with their new Timeline reports I find it really useful keeping track of HttpRequests, SQL requests among other things!
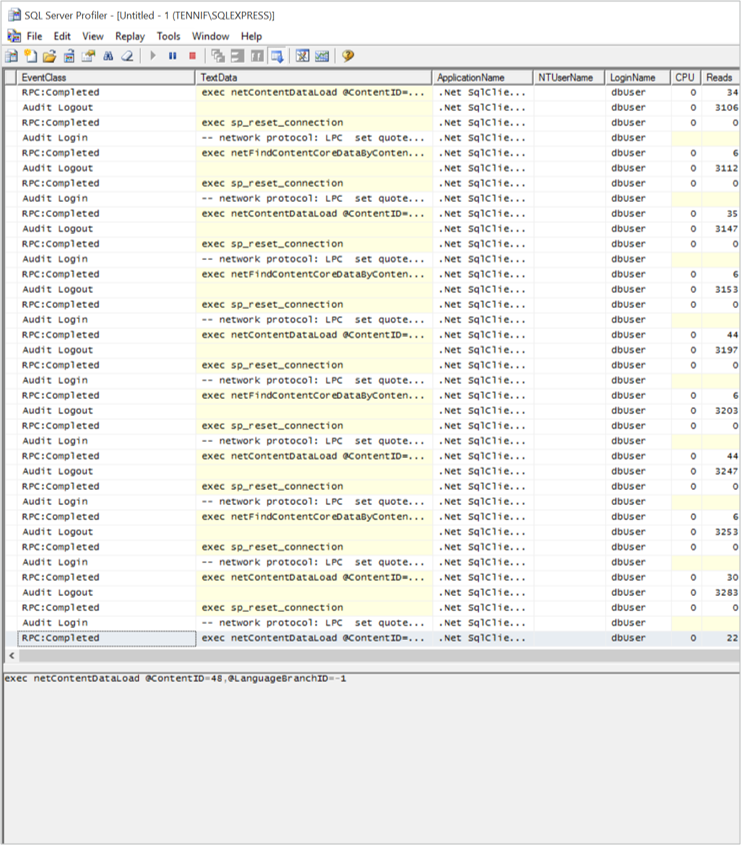
DotTrace

SQL Server Profiler

Microsoft’s own SQL Server Profiler gives you a great overview about what’s going on at your SQL Server. It monitors database requests and can give you an overview about performance as well.

I would recommend that you’re using SQL Server Profiler in production environment with caution. It’s mostly in production you can get the best trackings but it can lower performance while profiling.

sql profiler

Distractions

While profiling your solution you want to focus on your pain points without any distractions. Otherwise it would be like a doctor investigating pains in a knee while someone is hurting the patient’s arm.

The easiest ways to reduce this in an Episerver solution is to disable scheduled jobs and to focus your Http requests.

Scheduled Jobs

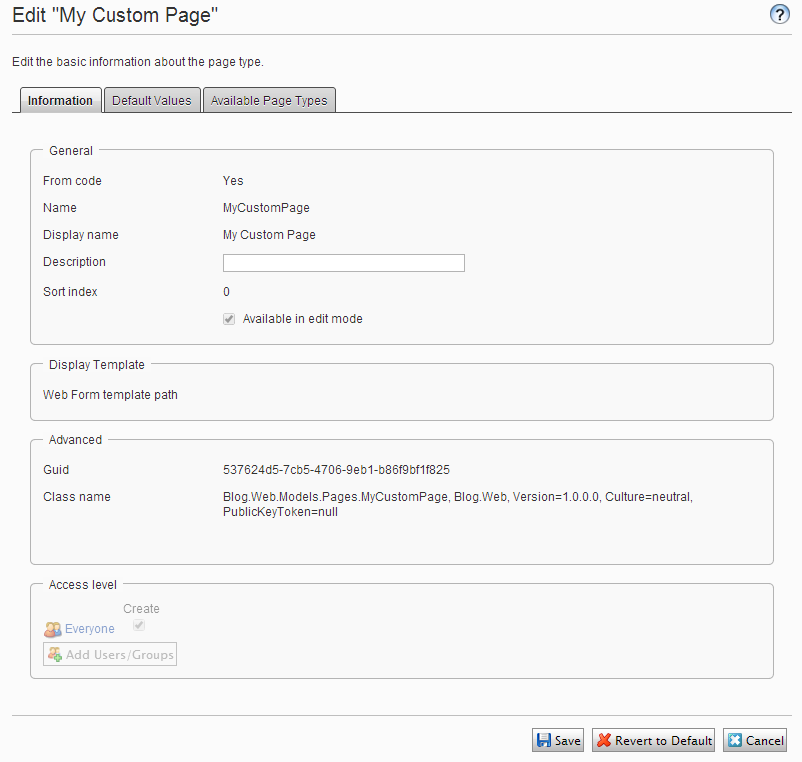
Meanwhile you’re trying to profile your solution, you don’t want any unecessary activities. Here’s where Episerver’s Scheduled jobs can be quite annoying! But it’s very easy to deactive in web.config by setting enableScheduler to “false” on the episerver/applicationSettings element.

<configuration>
	<episerver>
		<applicationSettings
			enableScheduler=“false” />
	</episerver>
</configuration>

Frontend resources

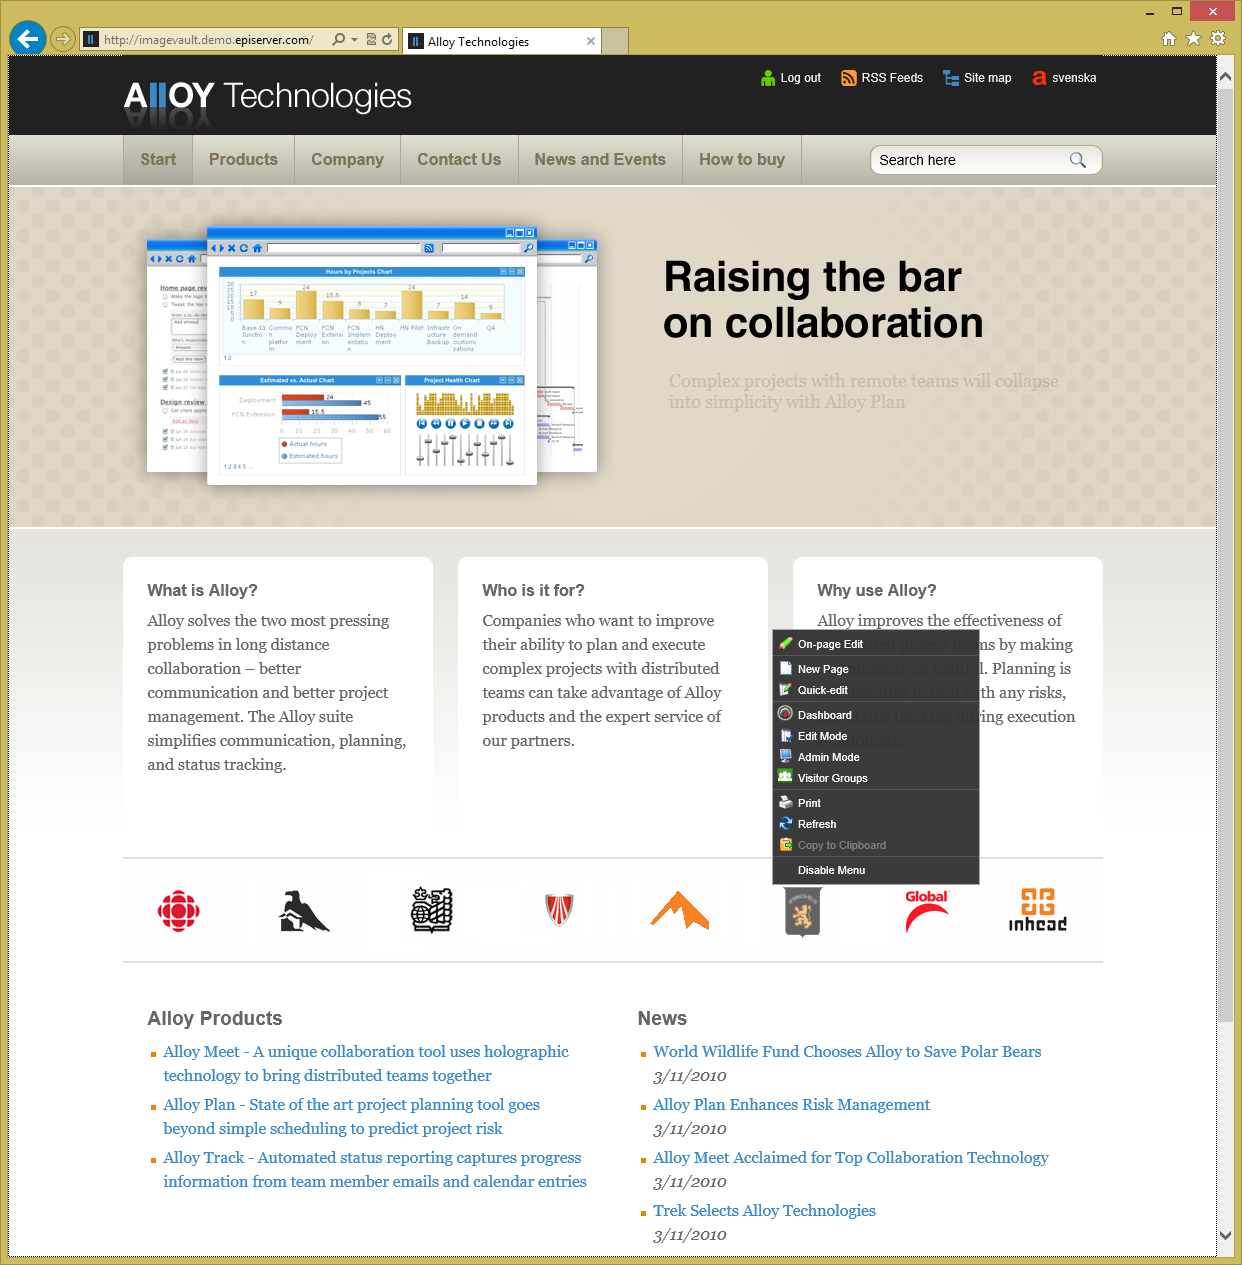
While you’re using a browser to visit pages in your Episerver site, your browser will create more requests to download resources such as JavaScript and Stylesheets. Modern browsers also want to find a /favicon.ico file on the server.

More importantly the browser downloads images embedded in the page. As you probably know, images in Episerver are managed as content where each request will use the Episerver CMS Api and in turn make requests to the database.

Some tools that can be used to focus on your specific functions are creating a .NET Command Line based solution, but better up using LINQPad – a nifty feature where you can “code” simple C# code without creating an entire Visual Studio project.

Another useful tool for creating single custom Http Requests are the Chrome plugin Postman.

Personally I like LINQPad since you can do more things than only Http Requests, such as firing multiple ones at the same time using the script Ascend product pages.linq that I used while profiling with DotTrace.

Scenarios

I will now present some profiling scenarios and explain why I recommend that you try to avoid them.

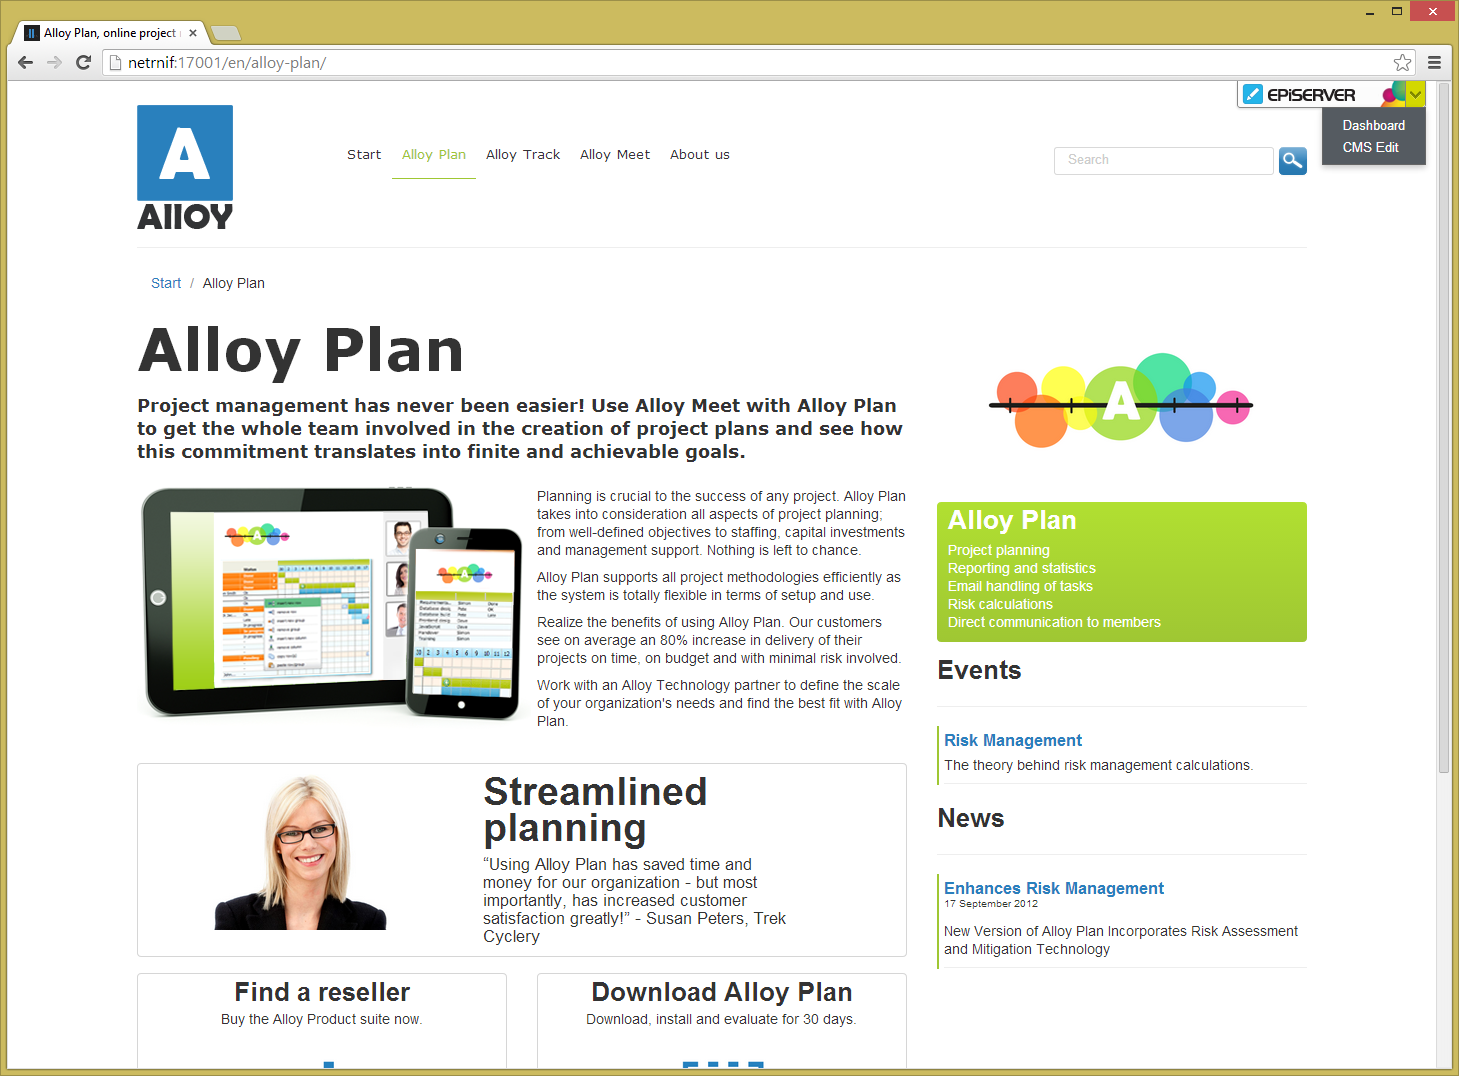
In the code, found on my GitHub repository I have created a specific Interface called IStandardPageRepository. The purpose is to list StandardPages that are descendants to a specific page. I’m using this on a ProductPageController that I have added to a normal Alloy website. To test the performance I have also created a nested tree structure of StandardPages beneath each Product Page in the Alloy website – Alloy Meet, Alloy Track and Alloy Plan.

The implementation of IStandardPageRepository is registered using the ServiceConfigurator attribute and fetched by injecting it in the constructor of my ProductPageController.

SessionState

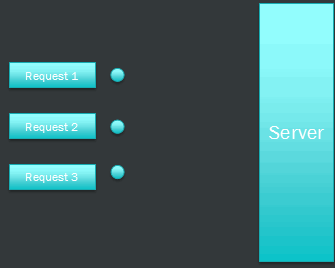
Using SessionState is a lovely feature where you can save information for the visitor between each request. However it has some faults that makes the website is perceived as slow. This is because .NET queues up each request from the same visitor so that Session information is synched between each request. This includes AJAX requests as well as the behavior of many visitors today where they might run your website in multiple tabs.

sessionstate

This is quite easy to fix by either adding the attribute [SessionState(SessionStateBehavior.Disabled)] to your MVC Controller or the attribute EnableSessionState=”false” to your WebForms registration directive.

sessionstate off

So what about your beloved Session information? Do you really need them? Try to build your solution so that you’re not depending on that kind of information between requests.

An approach I usually have is to stare a “session key” as a cookie and to store the information, such as the shopping cart, on the server. Just keep regional laws about what you’re allowed to store and require to inform your visitor in mind.

Also remember that third party add-ons and features such as some Visitor Groups might require SessionState to be enabled.

Cut to the Code

In the EmptyStandardPageRepository I have added a Thread.Sleep for 2 seconds to simulate a slow page request. By adding the SessionState attribute to the ProductPageController you can see the difference of having SessionState disabled by running your Alloy website and opening two of the Product Pages in separate tabs

Loading content and Episerver API

The most common function we use in Episerver is to load content in different fashions. I will go through some of the functions in the Episerver API and some pros and cons about them.

GetChildren

GetChildren might be one of the most used function in the Episerver API. It’s very easy to use and has some built in features to filter on Content Type and language.

However you’ll need to filter by access rights manually and whatever requirements you’ll have to select your content.

If you have a nested structure you’ll also need to recurse GetChildren for each and every child you find.

This can be seen in the GetChildren implementation of IStandardPageRepository. Here I’m only checking whether each content is a StandardPage but if you have more complex requirements this could be quite expensive.

GetDescendants and Get

Using GetDescendants in Episerver gives you a way to make a single request to receive a list of each and every descendent content.

However this returns a bunch of ContentReference instead of the actual Content, which can be used by the IContentLoader.Get method.

You’ll also need to check access rights and whatever requirements you’ll have which might make it quite expensive.

You can see an example of this in my implementation of IStandardPageRepository called GetDescendantsGet.

GetDescendants and GetItems

Not to forget that if you’re having a bunch of ContentReferences, you don’t need to iterate through these and run the IContentLoader.Get for each ContentReference.

Using IContentLoader.GetItems you can easier get each Content back. However you still need to check access rights and your other requirements about each content that might get expensive.

You can see more about this on the implementation GetDescendentsGetItems.

FindPagesWithCriteria

Here I’ll start focus on database requests and caching by looking at FindPagesWithCriteria which I think is a missunderstood function in Episerver.

It’s not a very precise feature which unfortunately only works with Pages at the moment. But if you have some basic requirements to get your content it works as a charm.

Looking at the implementation called FindPagesWithCritera you’ll find how I’m creating a criterion to find all pages that are Standard Pages.

Just don’t forget to cache the result since it will ALWAYS ends up in a database request using the stored procedure netPropertySearchValueMeta.

Caching

In Episerver you can find two Interfaces that concerns caching, IObjectInstanceCache which in its default implementation wraps HttpRuntime.Cache and ISynchronizedObjectInstanceCache which use IObjectInstanceCache and adds some synchronization to a Load Balanced environment.

ISynchronizedObjectInstanceCache is also found with EPiServer.CacheManager but of course we’d rather prefer using Interfaces and Episerver’s IOC management.

var cache = ServiceLocator.Current.GetInstance<ISynchronizedObjectInstanceCache>();
cache.Insert(key, value, cacheEvictionPolicy);

synchronized cache

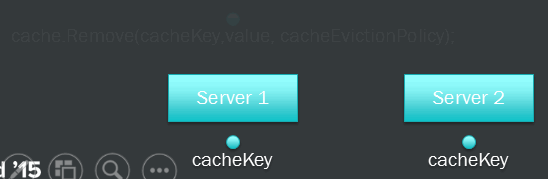
You can also work with a CacheEvictionPolicy to determine when the cache should be cleared. It could either by how long it should be stored in the cache, or set a dependency on other cache keys.

new CacheEvictionPolicy(new string[] { "cacheKey" });

The main difference between common cache keys and master are that master keys are not required to exist in the cache while cache keys do

new CacheEvictionPolicy(
	null, // for files
	null, // for cacheKeys
	new string[] { "masterKey" });

cachekeys

You can see how I’m caching the result of my CachedFindPagesWithCriteria, as you can see I have also added a Thread.Sleep and this will be covered in my next scenario about Race Condition Locks.

In a real world sitation it’s a more common practice to cache the ContentReference instead of the actual Content so that the editor won’t need to wait for the cache to expire for their updates to show, or that you’ll need to write unecessary cache clearing mechanisms.

Race Condition Locks

As mentioned previously, there’s a strange Thread.Sleep before I’m adding the PageDataCollection into the cache. This is to simulate that something is taking an amount of time to perform which might lead to things being run even if they shouldn’t.

Having SQL Profiler monitoring your database and running the LINQPad script Ascend Product pages cached.linq will show you that the first 2 requests are running the stored procedure netPropertySearchValueMeta twice while the third one doesn’t due to the result being cached.

Some resources can also lead to an Exception if two threads (for example two visits your your IIS application) are trying to access it.

Simple lock

Here is where Locking can come handy. The simple version is a simple Lock that makes sure that the second threads waits until the first are finished, and in my example also has stored the result in the cache. You can see an example of this in LockingFindPagesWithCriterion.

Note that after the lock I’m checking the cache again and that is because the locked threads needs to take another look in the cache after they’ve been waiting for the first one to perform its work and cached it.

A bad side in my example is that other threads that will need to perform the implementation of  LockingFindPagesWithCriterion based on another root node needs to wait for the first ones to finish before they can do their work.

This can be seen with the LINQPad script Ascend Product pages cached 2.linq.

Mini locking

This is where we can add a more granular locking mechanism by using mini locking.

Instead of having a static object as a lock, we’re using a ConcurrentDictionary<string, object> as a collection of locks. ConcurrentDictionary is a thread safe version of the dictionary and works good for this as you can see in the implementation MiniLockingCachedFindPagesWithCriterion.

Wanna play?

If you want to play around with the code examples from my session, you’ll find them on the GitHub repository https://github.com/alfnilsson/ascend2015. You can also find my presentation as PDF here.

These are just some basic steps to start improving and monitoring your solution. If you have other tips or tools that you use to on how to improve performance, feel free to comment this post.

Display Help text in All Properties Editing

To see a property’s help text in EPiServer 7, the editor needs to hover the property label.
Helptext visible by hover
This is not always an intuitive behavior for the editor but I’ve found a way to it by making the help text visible next to the property.

Create css file

Create a .css file in /ClientResources/Styles, I call mine “editorhelp.css”.

Add the following styles : UPDATED FOR EPISERVER 9 and 10 (verified on 10.3.1)

.Sleek .dijitTabPaneWrapper .epi-form-container__section__row label[title]:after {
    content: attr(title);
    display: block;
    font-size: 0.8em;
    font-style: italic;
    margin: 0.3em 0 0 0;
}

Register your .css file

Add the following to module.config

<module>
	<clientResources>
		<add name="epi-cms.widgets.base"
				 path="Styles/editorhelp.css"
				 resourceType="Style"/>
	</clientResources>
</module>

Tadaa!

Go to edit mode and your Help text should be visible.
Help text displayed

Note that EPiServer is very good on caching this. You might need to clear your cache and restart your website.

Tagged

Extend your functionality by using Blocks

I’ve found that you can create a small toolbox for the editor to change the behavior of your functionality by using Blocks, not as models but as pluggable functions. It’s quite similar to visual programming where you play around with boxes and arrows but in this case we create Blocks and drag them either to a ContentReference or a ContentArea.

Functionality Blocks

The idea came from a project where multiple web sites are using their own instance of the same EPiServer project. Each website had different requirements of filters and I needed something generic where a super user could setup and change the functionality.

Cut to the code

First I created an interface that I will put on each BlockType:

    public interface IDoSomethingWithPageLists : IContentData
    {
        IEnumerable<PageData> DoSomething(IEnumerable<PageData> pages);
    }

In my first implementation, say you’re listing lots of pages and the editor wants to reverse the order, this is a really silly example though.

    [ContentType(DisplayName = "Reverse pages", GUID = "1f58e116-6576-4737-8d2c-246010b5b302")]
    public class ReverseBlock : BlockData, IDoSomethingWithPageLists
    {
        [Display(
            Name = "Property Name",
            GroupName = SystemTabNames.Content,
            Order = 1)]
        public virtual string PropertyName { get; set; }

        public IEnumerable<PageData> DoSomething(IEnumerable<PageData> pages)
        {
            return pages.Reverse();
        }
    }

That was quite easy, you can also give the editor the possibility to give details or variables to the logic. Such as filtering on that a property requires a value.

    [ContentType(DisplayName = "Property must contain value", GUID = "25ed56de-0d0b-43bb-8beb-8a8442e1bdd1")]
    public class PropertyMustContainValueBlock : BlockData, IDoSomethingWithPageLists
    {
        [Display(
            Name = "Property Name",
            GroupName = SystemTabNames.Content,
            Order = 1)]
        public virtual string PropertyName { get; set; }

        public IEnumerable<PageData> DoSomething(IEnumerable<PageData> pages)
        {
            return pages.Where(p => p[this.PropertyName] != null);
        }
    }

And just for the case of repeating the possibility of letting the editor decide.

    [ContentType(DisplayName = "Take every #", GUID = "7b9f13a6-22fe-4c0f-a804-ff81879fa986")]
    public class TakeEveryBlock : BlockData, IDoSomethingWithPageLists
    {
        [Display(
            Name = "Take Every",
            GroupName = SystemTabNames.Content,
            Order = 1)]
        public virtual int TakeEvery { get; set; }

        public IEnumerable<PageData> DoSomething(IEnumerable<PageData> pages)
        {
            for (int i = 0; i < pages.Count(); i++)
            {
                if (i % this.TakeEvery == 0)
                {
                    yield return pages.ElementAt(i);
                }
            }
        }
    }

So in my Page Template, all I need to do iterate through my Blocks and let them do what they’re good at.

    IEnumerable<PageData> pages = GetChildren(CurrentPage.PageLink); // Getting children is only a simple example.

    if (CurrentPage.FunctionBlocks != null)
    {
        var blocks = this.CurrentPage.FunctionBlocks.FilteredItems.Select(x => this.Get(x.ContentLink)).Where(x => x != null);
        foreach (var block in blocks)
        {
            pages = block.DoSomething(pages);
        }
    }

    // Do something with the pages such as binding a Repeater/PageList or adding to a Model

Summary

This is a really simplified example how the editor easily plugg in some customized logic to my existing function.

It can sometimes be a little confusing for the editor if you use Functionality Blocks to create a too complex solution. But to simplify for the editor, you can use EditorDescriptors or creating custom Dojo components to help your Editor.

In this example, I’m automatically adding the filters. You can also render these blocks to the visitor and let the visitor activate the logic.

Creating Modular Settings with Blocks

2014-05-16: Updated the code to include code that disappeared due to non html-encoded code.

Through the years there has been many ways to add settings to an EPiServer site. To mention a few there are GuiPlugins in the Admin Mode Plug-in Manager, Dynamic Properties, Global Properties on the Start Page, special Settings Page Types etc.

First place: The Settings Page!

SettingsPage One of my favourites was the concept of a “Settings Page”! You’ve got version history, language management, you’re not mixing content and settings! But I would like to have it a little more modular where I could contain the Settings data close to where it is used. For example if I had a Gallery I would like to keep the Gallery settings in that Namespace or even that assembly. But after only a year in a busy project, that Settings Page Type could be bloated with properties, tabs and what not! That I had to add more Properties to that greedy all-knowing SettingsPage class each time I need to add a few more settings made that Page Type to something big and ugly that only a mother would love. Not to mention how difficult it is to find that exact property in Edit Mode and reversing a version in the version manager without accidentally reversing some other setting for some other module.

The runner up: Plug-ins!

GuiPlugIn This is an old sturdy trustworthy concept. I can even drop a complete assembly containing almost everything I need to have my Image Gallery (just as an example) up and running and for settings can easily be managed in the Plug-in Manager without being mixed with other settings in the code structure. But with today’s features where we’re getting used to version and language management we are no longer interested in this old plain data management. Not to forget that the user has to be an administrator to be able to access the settings and we’re easily getting back to the bloated editor view filled with many fields screaming for attention.

The new kid in town: Blocks!

SettingsBlock Now with Blocks in EPiServer 7 the concept “A Page in EPiServer is necessarily not something you can browse to” becomes a fact since a PageData in previous versions was used to contain data of various sorts – such as Settings. By using Blocks in EPiServer for settings, not only can the settings be modular, but you also have some sweet toys such as

  • Access Rights management through the ACL (and the forget-me-not Access to Tabs). If you play your cards right you could also set different settings for different users based on VisitorGroups and Roles.
  • Version management that only handles versions for your current module.
  • Language Management and even being able to set Fallback Languages for a specific Settings.
  • Fallback/Default values capabilities where you can add logic to the Get/Set Properties as well as the SetDefaultValues method.

I’m aware of the cons where it can end up with multiple Blocks instead of a single view filled with multiple fields. I think that this is a start where we can add a rich Settings Manager and improve the experience for the Editor and still have a strong and flexible data layer underneath. I have made a quick Proof of Concept of my idea and it can be found on GitHub.

Cut to the Code!

First, I created an Interface, in this Draft it doesn’t do anything else except helping me identify that this is one of my Settings.

public interface ISettingsBlock : IContentData
{
}

All I need to do is to implement this to my Block. Note that I’ve also made this unavailable for editors. I don’t want this thing being created all over the place!

[ContentType(DisplayName = "My Settings", GUID = "bc9d37bd-c725-4b8b-8a23-039710f476bf", Description = "", AvailableInEditMode = false)]
public class MySettingsBlock : BlockData, ISettingsBlock
{
    [Display(
        Name = "My Setting",
        GroupName = SystemTabNames.Content,
        Order = 1)]
    public virtual string MySetting { get; set; }
        
    [Display(
        Name = "My Setting with a Fallback",
        GroupName = SystemTabNames.Content,
        Order = 2)]
    public virtual string MySettingWithFallback {
        get
        {
            var contentLoader = ServiceLocator.Current.GetInstance<IContentLoader>();
            return this["MySettingWithFallback"] as string
                ?? contentLoader.Get(ContentReference.StartPage).Name;
        }
        set { this["MySettingWithFallback"] = value; } }
}

And since we want to easily find our Settings Blocks and don’t want to manually create them, I’ve added a little utility class for this.

public class SettingsRepository<T> where T : BlockData, ISettingsBlock
{
    #region [ Private Fields ]
    private const string RootFolderName = "[Settings]";
    private static readonly ConcurrentDictionary<string, object> MiniLocks = new ConcurrentDictionary<string, object>();

    #endregion

    protected virtual ContentReference ParentFolder
    {
        get
        {
            return GetOrCreate(ContentReference.SiteBlockFolder, "[Settings]");
        }
    }

    protected virtual string DefaultBlockName
    {
        get
        {
            var repo = ServiceLocator.Current.GetInstance<BlockTypeRepository>();
            var blockType = repo.Load<T>();
            return blockType.DisplayName;
        }
    }

    public T Instance
    {
        get
        {
            return GetOrCreateSettingsBlock();
        }
    }

    protected virtual T GetOrCreateSettingsBlock()
    {
        ContentReference contentLink = this.GetOrCreate(this.GetOrCreateContentFolder(), this.DefaultBlockName);
        var repo = ServiceLocator.Current.GetInstance<IContentRepository>();
        return repo.Get<T>(contentLink);
    }

    private ContentReference GetOrCreateContentFolder()
    {
        var repo = ServiceLocator.Current.GetInstance<IContentRepository>();
        ContentReference contentLink;
        var child = repo.GetChildren<ContentFolder>(ContentReference.SiteBlockFolder, LanguageSelector.AutoDetect(true)).FirstOrDefault(x => x.Name.Equals(RootFolderName));

        if (child == null)
        {
        const string Key = "ContentFolder";

        // Lock to prevent duplicates from being created.
        object miniLock = MiniLocks.GetOrAdd(Key, k => new object());

        lock (miniLock)
        {
            var childInLock = repo.GetChildren<ContentFolder>(ContentReference.SiteBlockFolder, LanguageSelector.AutoDetect(true)).FirstOrDefault(x => x.Name.Equals(RootFolderName));

            if (childInLock == null)
            {
            var clone = repo.GetDefault<ContentFolder>(ContentReference.SiteBlockFolder);
            clone.Name = RootFolderName;
            contentLink = repo.Save(clone, SaveAction.Publish, AccessLevel.NoAccess);
            }
            else
            {
            contentLink = childInLock.ContentLink;
            }

            // Saving some space
            object temp1;

            if (MiniLocks.TryGetValue(Key, out temp1) && (temp1 == miniLock))
            {
            object temp2;
            MiniLocks.TryRemove(Key, out temp2);
            }
        }
        }
        else
        {
        contentLink = child.ContentLink;
        }

        return contentLink;
    }

    private ContentReference GetOrCreate(ContentReference parentLink, string name)
    {
        var repo = ServiceLocator.Current.GetInstance<IContentRepository>();
        ContentReference contentLink;
        var child = repo.GetChildren<T>(parentLink, LanguageSelector.AutoDetect(true)).FirstOrDefault() as IContent;

        if (child == null)
        {
        string key = typeof(T).ToString();
        
        // Lock to prevent duplicates from being created.
        object miniLock = MiniLocks.GetOrAdd(key, k => new object());

        lock (miniLock)
        {
            var childInLock = repo.GetChildren<T>(parentLink, LanguageSelector.AutoDetect(true)).FirstOrDefault() as IContent;

            if (childInLock == null)
            {
            var clone = repo.GetDefault<T>(parentLink) as IContent;
            clone.Name = name;
            contentLink = repo.Save(clone, SaveAction.Publish, AccessLevel.NoAccess);
            }
            else
            {
            contentLink = childInLock.ContentLink;
            }

            // Saving some space
            object temp1;

            if (MiniLocks.TryGetValue(key, out temp1) && (temp1 == miniLock))
            {
            object temp2;
            MiniLocks.TryRemove(key, out temp2);
            }
        }
        }
        else
        {
        contentLink = child.ContentLink;
        }

        return contentLink;
    }
}

To get the setting I’m interested in, all I need to do is

var mySetting = new SettingsRepository<MySettingsBlock>().Instance.MySetting;

My next step would be to maybe move some of the information such as the Block Name to the Interface (and by that to the Block class itself) instead of the Repository but that feels more like a religious discussion. But the thing that would really improve this concept would be a some kind of interface to get an overview of (and possibly edit) all Settings.

Change how your EPiServer ContentType is administered with AdministrationSettingsAttribute

Are you tired of Administrators changing your Content Types and breaking your web site?

Fear not, I’ve found a cool hidden gem that allows you to disable fields when editing Content Types in Admin Mode – the EPiServer.DataAnnotations.AdministrationSettings attribute.

It is simply added to your Content Type Class

[AdministrationSettings(
  [bool CodeOnly],
  [ContentTypeFields ContentTypeFields],
  [string GroupName],
  [int Order],
  [PropertyDefinitionFields PropertyDefinitionFields],
  [bool Visible])]
public class StandardPage : PageData
{
...
}

With the AdministrationSettings attribute you can edit the following parts

How it is displayed

GroupName
The GroupName is used to group your Content Types in Admin mode.

GroupName

I have set the GroupName = “My Custom Pages” to my Page Type “My Custom Page”

Visible
If you simply want to hide your Content Type in Admin Mode.

Order
An integer where you define the sort order inside the Group.

Disable Administrator accessability

CodeOnly
If you simply want to disable changes for the entire Content Type.

PropertyDefinitionFields
This is an enum flag that only enables certain fields on the Edit Property view for the Content Type.
Note that if you create a Property, it cannot be saved unless you allow the required fields.

  • None
  • Type
  • Name
  • PropertySettingsControl
  • DefaultValue
  • Required
  • Searchable
  • LanguageSpecific
  • DisplayEditUI
  • EditCaption
  • HelpText
  • Tab
  • FieldOrder
  • All
Caption

I have only enabled the Help text with PropertyDefinitionFields = PropertyDefinitionFields.HelpText.

ContentTypeFields
Same as PropertyDefinitionFields but with the fields for your Content Type.

  • None
  • Name
  • Description
  • DisplayTemplates
  • SortOrder
  • DisplayName
  • AvailableInEditMode
  • ACL
  • DefaultValues
  • AvailablePageTypes
  • All
ContentTypeFields

I have only enabled the Description field with ContentTypeFields = ContentTypeFields.Description

Summary

This attribute will help you organize your Content Types and to disable editing capabilities for Content Types you really don’t want an administrator to mess with. But use it wisely!

Having many and small groups can make a mess for the administrator and yourself.

Hooking up to the EPiServer QuickNavigator

I’ve seen many projects in EPiServer CMS 5 and 6 where the developers has extended the Context Menu. Menu options such as enabling developer modes or shortcuts to certain tools are some of the most popular extensions.

ContextMenu

In EPiServer 7 CMS, the Context Menu has been replaced with the QuickNavigator. But unfortunately it was not compatible with the Context Menu extensions and it was quite hard coded.

QuickNavigator original

With the Release with EPiServer CMS 7.5, things started to brighten up again! Now you can register your own QuickNavigatorItemProvider.
The biggest difference is that instead of only rendering the options “Edit Mode” and “Dashboard”, the QuickNavigator now iterates through all implementations of the interface IQuickNavigatorItemProvider that is registered in EPiServer’s IoC Container.

QuickNavigator

I’ve taken a look at how to use this to implement one of the missing QuickNavigator options, the Logout button. This option will not only log you out. It will also redirect you to the page you previously watched.

The code can be seen below and also be found on GitHub.

Cut to the code!

First of all I needed to create my own implementation of the IQuickNavigatorItemProvider.

This part is quite similar to when extending the EPiServer Online Center top navigation.

Basically I copied the original implementation but changed which items I wanted to provide.

[ServiceConfiguration(typeof(IQuickNavigatorItemProvider))]
public class LogoutQuickNavigatorItemProvider: IQuickNavigatorItemProvider
{
    private readonly IContentLoader contentLoader;

    public int SortOrder
    {
        get
        {
            return 10;
        }
    }

    public LogoutQuickNavigatorItemProvider(IContentLoader contentLoader)
    {
        this.contentLoader = contentLoader;
    }

    public IDictionary<string, QuickNavigatorMenuItem> GetMenuItems(ContentReference currentContent)
    {
        var urlBuilder = new UrlBuilder("/logout");
        if (this.IsPageData(currentContent))
        {
            var urlResolver = ServiceLocator.Current.GetInstance();
            string url = urlResolver.GetUrl(currentContent);

            urlBuilder.QueryCollection.Add("ReturnUrl", url);
        }

        return new Dictionary<string, QuickNavigatorMenuItem> {
            {
                "customlogout",
                new QuickNavigatorMenuItem("/shell/cms/menu/logout", urlBuilder.ToString(), null, "true", null)
            }
        };
    }

    private bool IsPageData(ContentReference currentContentLink)
    {
        return this.contentLoader.Get(currentContentLink) is PageData;
    }
}

By using the ServiceConfigurationAttribute, I will inject my implementation of IQuickNavigatorItemProvider into the IoC container.
I’m also reusing the xpath /shell/cms/menu/logout that is the xpath for the term “Log out” used in Online Center.

The bonus!

Here, I could just as easily redirect the user to EPiServer’s built-in logout page on /util/login.aspx. But instead of a message that informs the visitor about being logged out, I’d rather redirect the user back to the previous page.

One idea was to create a custom path that performs the signout and redirects my user.

But since I feel EPiServer knows what is needed for most circumstances to logout a user better than me, I’d rather reuse their functionality.

To have this implementation as lightweight as possible I created a custom Route, that takes the visitor to Logout.aspx but with a little twist.
It loads the ordinary Logout.aspx, but hooks up to the PreRender Event to perform a classic Redirect to the previously visited page.

public class LogoutRedirectRouteHandler : IRouteHandler
{
    public IHttpHandler GetHttpHandler(RequestContext requestContext)
    {
        var logout = BuildManager.CreateInstanceFromVirtualPath("/Util/Logout.aspx", typeof(Logout)) as Logout;
        if (logout == null)
        {
            // Something seems wrong
            throw new Exception();
        }

        logout.PreRender += this.LogoutOnPreRender;
        return logout;
    }

    private void LogoutOnPreRender(object sender, EventArgs eventArgs)
    {
        var returnUrl = HttpContext.Current.Request.QueryString["ReturnUrl"];
        HttpContext.Current.Response.Redirect(returnUrl);
    }
}

And to register my Route is easy as cake. With some inspiration from Johan Kronbergs blog about Custom Routes, I create an InitializableModule that adds my route to the RouteTable:

[InitializableModule]
[ModuleDependency(typeof(InitializationModule))]
public class LogoutQuickNavigatorInitializer : IInitializableModule
{
    private const string RouteName = "LogoutRedirect";

    public void Initialize(InitializationEngine context)
    {
        RouteTable.Routes.Add(RouteName, new Route("logout", new LogoutRedirectRouteHandler()));
    }

    public void Preload(string[] parameters) { }

    public void Uninitialize(InitializationEngine context)
    {
        RouteTable.Routes.Remove(RouteTable.Routes[RouteName]);
    }
}

Simplifying allowed content types in Editor Descriptor

Update 2: About a week I noticed that this functionality already exists according to Linus Ekström. But you can take this example on how to simplify attributes with UI hints and being able to read information directly from the Content Type.

Update: Updated to correct code

One of the new things in EPiServer 7.5 is the ability to restrict available content in ContentAreas (and similar Properties). A great way that prevents content to be dragged to a ContentArea compared to the validator option that is common in EPiServer 7 and 7.1 sites.

EPiServer developer Ben McKernan has written a blog post about this.

I’ve simplified this to make it easier for a developer to understand the purpose of the Editor Descriptor and being able to control exactly which types that are allowed from the Content Type.

Cut to the code!

This is how it will look on the accual Content Type when adding a ContentArea Property:

[AllowedContentTypes(typeof(StandardPage))]
public virtual ContentArea StandardPages { get; set; }

The code for the AllowedContentTypes attribute looks like this:

[AttributeUsage(AttributeTargets.Property | AttributeTargets.Field, AllowMultiple = true)]
public class AllowedContentTypesAttribute : UIHintAttribute
{
  public AllowedContentTypesAttribute(params Type[] types) : base("AllowedContentTypes")
  {
    this.Types = types;
  }

  public Type[] Types { get; set; }
}

And the code for the Editor Descriptor – this is a merge between Ben’s code and the original ContentArea Editor Descriptor from the EPiServer.Cms.Shell.UI assembly.

[EditorDescriptorRegistration(TargetType = typeof(ContentArea), UIHint = "AllowedContentTypes")]
public class AllowedContentTypes : EditorDescriptor
{
  public AllowedContentTypes()
  {
    this.ClientEditingClass = "epi-cms.contentediting.editors.ContentAreaEditor";
    this.OverlayConfiguration.Add("customType", "epi-cms.widget.overlay.ContentArea");
  }

  public override void ModifyMetadata(ExtendedMetadata metadata, IEnumerable attributes)
  {
    base.ModifyMetadata(metadata, attributes);

    var attribute = metadata.Attributes.OfType<AllowedContentTypesAttribute>().SingleOrDefault();
    if (attribute != null)
    {
      this.AllowedTypes = attribute.Types;
    }

    metadata.OverlayConfiguration["customType"] = (object)"epi-cms.widget.overlay.ContentArea";
    metadata.CustomEditorSettings["converter"] = (object)"epi-cms.propertycontentarea";
  }
}

Versioning Add-ons (specially EPiServer UI) in EPiServer 7

One of the common problems I’ve heard seems to be how to deploy a new version of EPiServer UI. The ultimate solution is to keep all environments in sync while not disturbing the other developers that are working at the same time when one developer is upgrading to the latest UI. At the same time the client should be able to download and install Add-ons.

Quick brief of Add-ons

As you probably know, the EPiServer UI is an “Add-on” (NuGet-based, downloadable package) and managed in the Add-Ons Manager in basically in the same way as all third-party Add-ons.

In a typical installation, the add-ons can be found in the ModulesRepository folder and unpacked into the Module folder in your VPP directory.

Note that the version of your add-on needs to be in sync with the assemblies in the modulesbin folder in your web root directory!

When browsing to the Add-on Manager, the EPiServer.Packaging more known as the EPiServer Add-On Store Platform module scans your Modules folder to list what Add-ons are installed, which version they are and checks whether a new version is available.

You can read more on the Add-ons, how they work and how to create your own on Dmytro Duks and Sergii Vorushylos blogs.

Here are some suggestions on how to keep Add-ons synced

Shared VPP among developers

In many companies, there are several developers working in the same EPiServer project at the same time and they work against the same database, hence they need a shared VPP folder so that documents referenced from the database can be in sync.

The most common solution to this is to have a shared folder on the local network such as \\FileShare\VPP\AlloyTemplates\ and setting the physicalPath attribute on your VirtualPathProviders in EPiServerFramework.config to a folder on that file share.

Disadvantages

While this is an easy way to keep the same version to all developers when backstaging, some manual interventions are needed when one developer needs to have another version for a short while.

For example when one developer is updating an EPiServer add-on, the other developers will have a discrepancy between the VPP version of the add-on and the assembly version in the modulesbin folder until the new version is committed and the other developers have pulled the latest version.

An other disadvantage is also that you need to manually update the other environments such as STAGE or PRODUCTION since the modulesbin folder is probably your source control while the VPP folder is not.

Separating Modules folders and Content folders in VPP

My idea here is to separate Content and Module folders. A suggestion is to create a sibling to your web root folder called EPiServerModules and move your Modules and ModulesRepository folders from your VPP directory here.

First thing is to adjust where EPiServer searches for the UI modules:

  • Open EPiserverFramework.config
  • Find your Virtual Path Provider section with the name ProtectedAddons
  • Change the physicalPath attribute to ..\EPiServerModules\Modules

Now when you’re browsing to your EPiServer UI, everything will work fine as far as I have found. But the Add-on Store Platform will not know what modules are installed hence it cannot find new updates for you to install.

Second thing will be to adjust where the modules are installed:

  • Open web.config
  • Find the episerver.packaging ConfigSection
  • Add the following attributes protectedPath=”..\EPiServerModules\Modules” and repositoryPath=”..\EPiServerModules\ModulesRepository”

Add the EPiServerModules folder to your source control. If you are using TFS, make sure to check out these folders since the files will be flagged as read only until they are to be changed.

Now each developer will have an individual Modules repository and depending on how your deployment routines, it could be much easier for you to deploy your updated Add-ons.

Disadvantages

This will take about 60-80 MB of disk space per project on your local drive.

Also if you don’t make sure to backstage possible updated or added Add-ons from your environments you will probably loose what Add-ons you or your client have added since last deployment.

Conclusion

I still have some problems seeing the whole picture with the Add-ons.

It’s nice that it’s easy to download new versions and probably this increases how often EPiServer can release new versions. But the risk of things getting out of hand increases.

It’s hard to find a good balance between being confident that added files to the application is approved and tested by the EPiServer Partner and letting the client user add things (that might break the web site). A rule found on most developers is that everything that ends up in the web root should be found in the Source Control.

In this article my main focus has been to make the life more streamlined for the developers and preventing risks while deploying. Do you have any suggestions on managing the Add-ons and specially the EPiServer UI between environments? Please leave a comment below!