Through the years I can’t really keep count on how many custom forms I have created. I have found a simple pattern so that I can easily collect, validate and save the submitted information using a Model, Validator and Saver (MVS?).
Dos and don’ts
I want to show you some practices I consider as Don’t and what you can Do to avoid them. These are some ways I’ve seen that people have handled form submits in a bad way. Some of them are really obvious but worth repeating.
The use case throughout this post is a form that contains a name field. The name field is required and the name must start with “Alf”
I also want to make it easy to add several fields into the form without making the code too complex.
In the code examples I won’t go into details on how I pass validation messages to the view but in the end I will give some examples of that as well.
Let’s start:
1: Don’t repeat yourself:
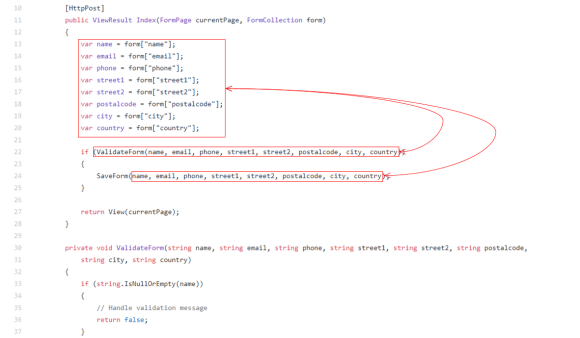
A common way to collect the form input after submit is to go either to TextBox.Text (WebForms) or form[“name”] on the FormCollection (MVC).
Nothing wrong with that but don’t run to the FormCollection every time you need your value.
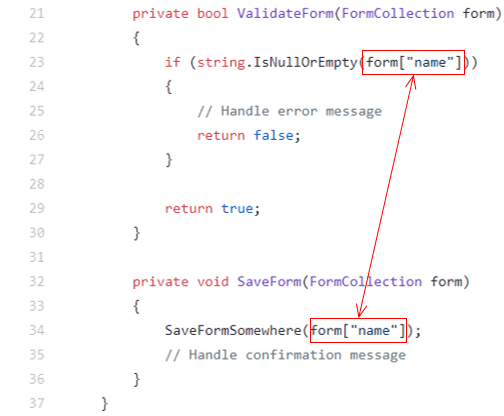
Specially if you want to add fallback functionality or extend the form somehow.
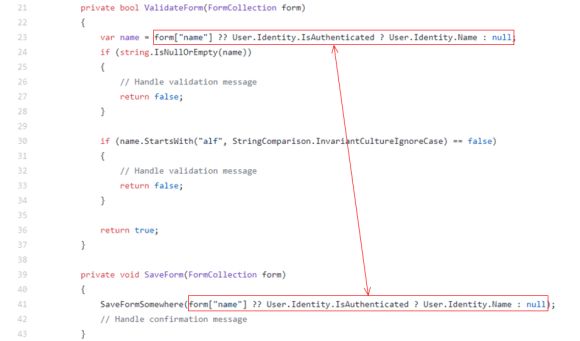
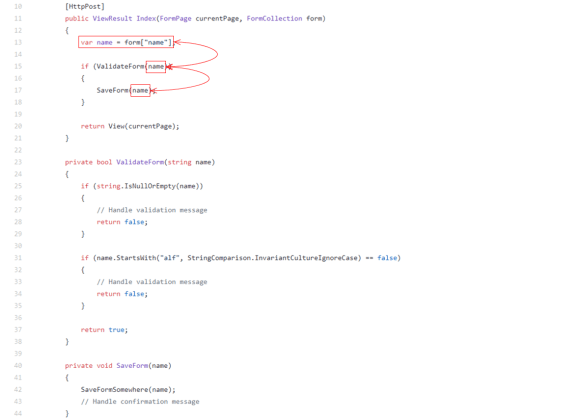
Do save it:
So save it to a single variable and reuse it.
Personally I prefer a local variable that is passed throughout the life cycle instead of a private Field or Property.
That makes it easier to make sure that nothing is fiddling with the value.
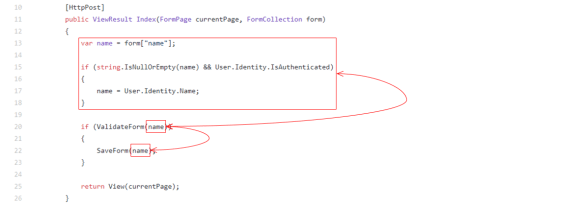
And if you would like to add fallback, you only need to take care of that at one place.
2: Don’t have a never ending list of parameters
Having just the name is a piece of cake. But when we need to add more fields it can get quite messy.
It makes all the methods hard to read, hard to extend and easy to use wrong. This also takes me to an ugly part (in my opinion) in C# – the out parameter.
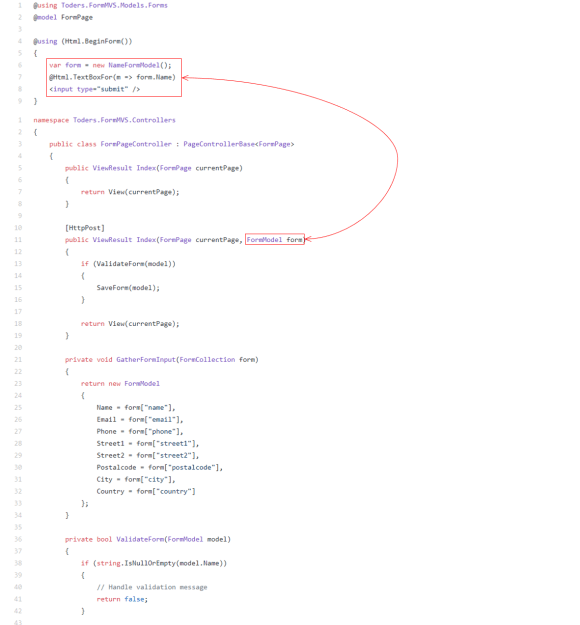
For example if you move the gathering of the form input into a separate method:
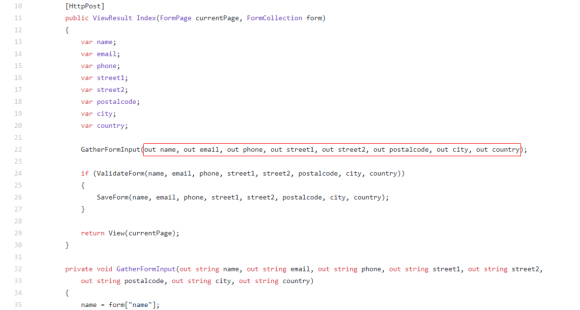
I think this is very hard to work with and makes the code quite ugly and comples.
Do use a Model
It’s much easier to transport lots of values using a Model. Also if you need to extend the form, you can easily add more properties to the class.
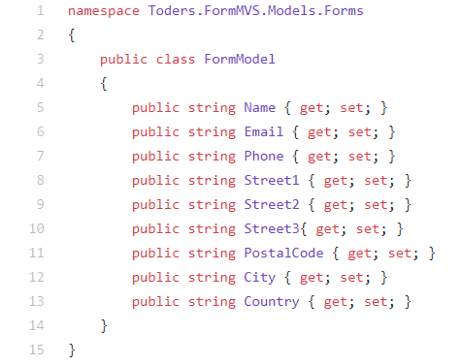
Just create a new instance of it, populate it and pass it around:
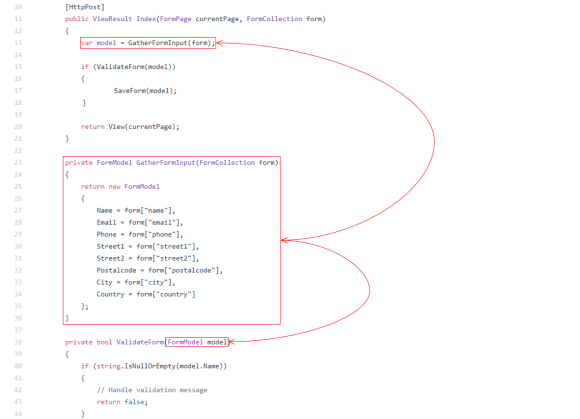
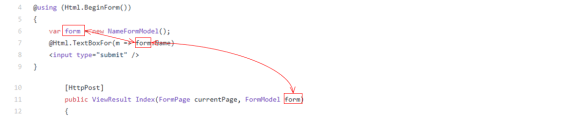
Bonus: With MVC you can use the Model already in the view and get it populated in the Controller!
Quite simple, since I don’t need to have the FormModel in my ViewModel (normally I don’t) but I want to use the FormModel, just do it like this View.
And let it be sent straight to the controller. Just keep in mind that the variable in the Lambda expression must match the variable of the FormModel parameter in the Controller.
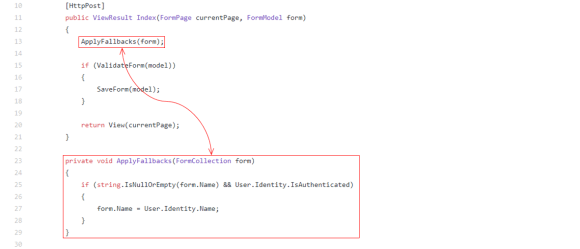
Though you’ll need to implement separate logic and fallback functionality yourself unless you start doing some more fancy MVC magic.
Validation
With MVC populating your Model, you could add validating attributes such as [Required] to the Model Properties, however I think it’s quite alot of work to get that working the way I want to so I’m doing the frontend and backend validation myself.
Of course using native browser functionality as much as possible for example with the required attribute.
3: Separate functionality
With this I’m using patterns and principles such as “single responsibility”, “separations of concerns” and striving for testability and so on.
It’s good to separate your code so that you can isolate the functionality based on what they do. It is also easier to create abstractions for these to change behavior in the future or be used with Feature Toggles.
What parts can we separate?
Looking at the Controller I can identify two parts that concerns the form: Validating and saving the form.
Therefore we can create separate classes for this.
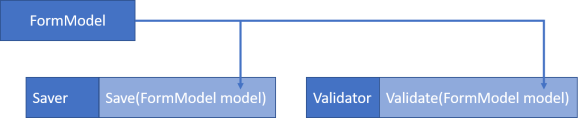
Validator:
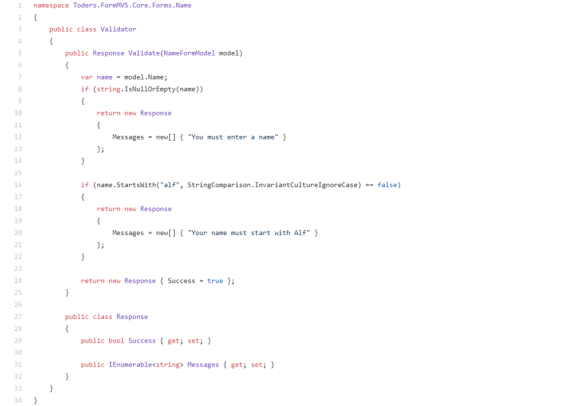
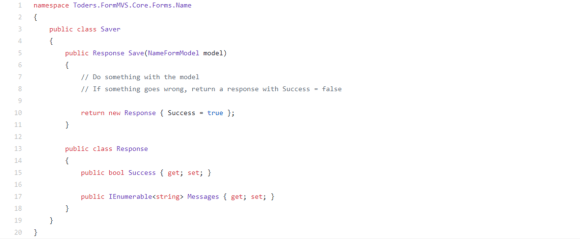
A Saver:
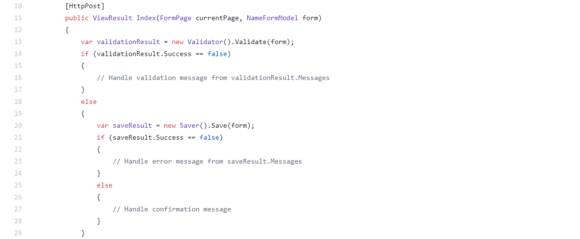
And use them in the Controller:
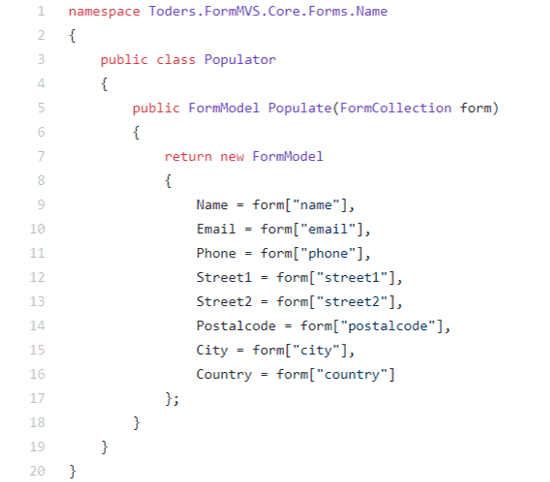
If I don’t let MVC doing the population of the Model, I sometimes have a specific class for that as well.
Result
Note that each class have a Result class. This is to not have magic code such as “result message == null” means “everything wen’t fine”.
Some people would have the validation to return a bool and have an out parameter with the message. But what did I just say about outing?
So they return a ResultModel that contains whether everything wen’t fine and possible messages telling what is not fine.
As you can see, the Validator and Saver have a Result class each. This could be the same class but sometimes I have ended up extending the class for one of the classes so therefore I keep them separated.
Tadaa!
So with this done, we have
- Extracted validating and saving the form into separate classes.
- To keep it simple and extendable, we have created a FormModel that contains all values
- A ResultModel to return the result (hence the name).
You can see the code examples on my GitHub as well as a more finished concept that can be added to an Alloy website.
Do you have any tips on how to work with forms? Leave a comment!
